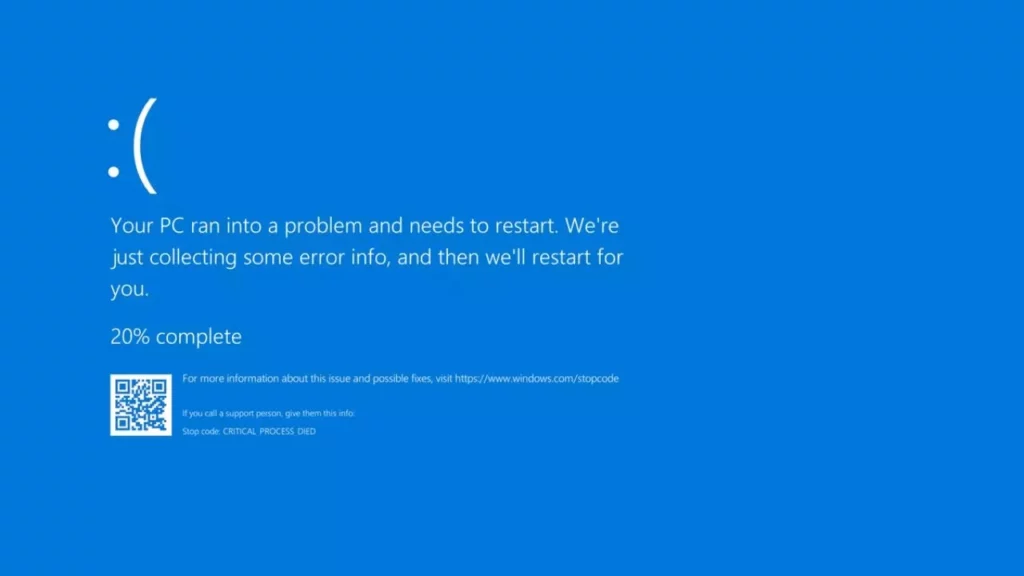
Bu gece yayınlanan Crowdstrike güncellemesi tüm bilgisayar sistemlerini çökmesine neden oldu. Tüm dünyaya yayılmış ve yayılmaya devam eden sorunun kaynağı Crowdstrike update i olarak görünüyor.
Üretici tarafından yapılan resmi açıklama ve çözüm önerisi için aşağıdaki linki kullanabilirsiniz.


Dakika dakika gelişmeleri aktarmaya ve bilgi geldikte çözüm yollarını paylaşmaya devam edeceğiz. Lütfen takipte kalın.
Son güncelleme 9.33
Türkçe karşılığı
1 – Windows’u Güvenli Modda veya Windows Kurtarma Ortamında başlatın.
2 – C:\Windows\System32\drivers\CrowdStrike dizinine gidin.
3 – “C-00000291*.sys” ile eşleşen dosyayı bulun ve silin.
4 – Bilgisayarı normal şekilde başlatın.
Son güncelleme 13.00
GPO İle CrowdStrike Çökme Sorununu Giderme
CrowdStrike sürücüsünün neden olduğu Mavi Ekran (BSOD) hatalarını gidermek için, Grup Politikası (GPO) kullanarak Güvenli Mod’da çalışan bir betik ayarlayabilirsiniz.
1. PowerShell Betiğini Oluşturun
Problemli CrowdStrike sürücüsünü silen ve Güvenli Mod’u geri alan bir PowerShell betiği oluşturun:
$filePath = "C:\Windows\System32\drivers\C-00000291*.sys"
$files = Get-ChildItem -Path $filePath -ErrorAction SilentlyContinue

foreach ($file in $files) {
    try {
        Remove-Item -Path $file.FullName -Force
        Write-Output "Deleted: $($file.FullName)"
    } catch {
        Write-Output "Failed to delete: $($file.FullName)"
    }
}

bcdedit /deletevalue {current} safeboot
2. Güvenli Mod için Bir GPO Oluşturun
- Grup Politikası Yönetim Konsolu’nu (GPMC) açın.
- Uygun Organizasyon Birimi’ne (OU) sağ tıklayın ve “Bu alan adında bir GPO oluştur ve buraya bağlayın” seçeneğini seçin.
- GPO’yu adlandırın, örneğin, “CrowdStrike Fix Safe Mode”.
3. GPO’yu Düzenleyin
- Yeni GPO’ya sağ tıklayın ve “Düzenle”yi seçin.
Computer Configuration -> Policies -> Windows Settings -> Scripts (Startup/Shutdown)yolunu izleyin.Startupa çift tıklayın, ardındanAdde tıklayın.Script Namealanında,CrowdStrikeFix.ps1dosyasını kaydettiğiniz yeri bulun ve seçin.- Tüm diyalog kutularını kapatmak için
OKe tıklayın.
4. Güvenli Mod Başlatmak İçin Bir Betik Oluşturun
Bilgisayarı Güvenli Mod’da başlatmak için başka bir PowerShell betiği oluşturun ve bu betiği anında uygulamak için bir GPO’ya bağlayın:
bcdedit /set {current} safeboot minimal
Restart-Computer
5. Güvenli Mod Betiğini Uygulamak İçin Bir GPO Oluşturun
- Grup Politikası Yönetim Konsolu’nu (GPMC) açın.
- Uygun Organizasyon Birimi’ne (OU) sağ tıklayın ve “Bu alan adında bir GPO oluştur ve buraya bağlayın” seçeneğini seçin.
- GPO’yu adlandırın, örneğin, “Force Safe Mode”.
- Yeni GPO’ya sağ tıklayın ve “Düzenle”yi seçin.
- Computer Configuration -> Policies -> Windows Settings -> Scripts (Startup/Shutdown) yolunu izleyin.
Startupa çift tıklayın, ardındanAdde tıklayın.Script Namealanında,ForceSafeMode.ps1dosyasını kaydettiğiniz yeri bulun ve seçin.- Tüm diyalog kutularını kapatmak için
OKe tıklayın.
6. GPO’ları Uygulayın
Force Safe ModeGPO’sunun önce etkilenen bilgisayarlara uygulandığından emin olun.- Bilgisayar, Güvenli Mod’da başlatılacak ve
CrowdStrikeFix.ps1betiğini çalıştıracaktır. - Sorun düzeltildikten sonra, betik başlatma ayarlarını normal moda geri alacaktır.
Bu adımları izleyerek, problemli CrowdStrike sürücüsünü otomatik olarak silen ve sisteminizi normal moda döndüren bir çözüm oluşturabilirsiniz. Bu, Mavi Ekran hatalarını hızlı ve etkili bir şekilde gidermenizi sağlar.
Kaynak: https://chain-adasaurus-94b.notion.site/CrowdStrike-fc3eef9af82a4a858b50edc9afbb01ca
Son Güncelleme
14:19
CS sitesindeki orjinal metin aşağıdaki gibidir;
Summary
CrowdStrike is aware of reports of crashes on Windows hosts related to the Falcon Sensor.
Details
Symptoms include hosts experiencing a bugcheck\blue screen error related to the Falcon Sensor.
Windows hosts which have not been impacted do not require any action as the problematic channel file has been reverted.
Windows hosts which are brought online after 0527 UTC will also not be impacted
This issue is not impacting Mac- or Linux-based hosts
Channel file “C-00000291.sys” with timestamp of 0527 UTC or later is the reverted (good) version. Channel file “C-00000291.sys” with timestamp of 0409 UTC is the problematic version.
Current Action
CrowdStrike Engineering has identified a content deployment related to this issue and reverted those changes.
If hosts are still crashing and unable to stay online to receive the Channel File Changes, the following steps can be used to workaround this issue:
Workaround Steps for individual hosts:
Reboot the host to give it an opportunity to download the reverted channel file. If the host crashes again, then:
Boot Windows into Safe Mode or the Windows Recovery Environment
Navigate to the %WINDIR%\System32\drivers\CrowdStrike directory
Locate the file matching “C-00000291*.sys”, and delete it.
Boot the host normally.
Note: Bitlocker-encrypted hosts may require a recovery key.
Workaround Steps for public cloud or similar environment including virtual:
Option 1:
Detach the operating system disk volume from the impacted virtual server
Create a snapshot or backup of the disk volume before proceeding further as a precaution against unintended changes
Attach/mount the volume to to a new virtual server
Navigate to the %WINDIR%\System32\drivers\CrowdStrike directory
Locate the file matching “C-00000291*.sys”, and delete it.
Detach the volume from the new virtual server
Reattach the fixed volume to the impacted virtual server
Option 2:
Roll back to a snapshot before 0409 UTC.
Workaround Steps for Azure via serial
Login to Azure console –> Go to Virtual Machines –> Select the VM
Upper left on console –> Click : “Connect” –> Click –> Connect –> Click “More ways to Connect” –> Click : “Serial Console”
Step 3 : Once SAC has loaded, type in ‘cmd’ and press enter.
type in ‘cmd’ command
type in : ch -si 1
Press any key (space bar). Enter Administrator credentials
Type the following:
bcdedit /set {current} safeboot minimal
bcdedit /set {current} safeboot network
Restart VM
Optional: How to confirm the boot state? Run command:
wmic COMPUTERSYSTEM GET BootupState
For additional information please see this Microsoft article.
Latest Updates
2024-07-19 05:30 AM UTC | Tech Alert Published.
2024-07-19 06:30 AM UTC | Updated and added workaround details.
2024-07-19 08:08 AM UTC | Updated
2024-07-19 09:45 AM UTC | Updated
CrowdStrike Güncellemesi ve Azure Stack HCI Çözümü
CrowdStrike’un Falcon Sensor yazılımındaki hatayı düzeltmek için Azure Stack HCI ve Hyper-V sunucularında sanal makineler için hızlı ve etkili bir PowerShell script’i oluşturduk. Bu script, sanal makinelerinizdeki CrowdStrike hatasını giderirken aynı zamanda BitLocker senaryosunu da içerecek şekilde güncellendi.
Script Kullanımı:
function Fix-CrowdStrikeBug {
    param (
        [Parameter(Mandatory = $true)]
        [string]$VMName,
        [Parameter(Mandatory = $false)]
        [SecureString]$Password
    )

    # Get VM
    $VM = Get-VM $VMName -ErrorAction SilentlyContinue

    # Check VM
    if ($VM -eq $null) {
        Write-Host "VM does not exist."
        return
    }

    # Check VM State
    $VMState = $VM.State
    if ($VMState -ne "Off") {
        Write-Host "Please turn off the VM."
        return
    }

    # Get Main VMDisk
    $VMDisk = $($VM | Get-VMHardDiskDrive)[0] | Get-VHD

    # Check VMDisk
    if ($VMDisk -eq $null) {
        Write-Host "No VHD found for VM."
        return
    }

    # Set VHDX Path
    $vhdxPath = $VMDisk.Path

    # Mount the VHDX
    Mount-VHD -Path $vhdxPath

    try {
        # Get the drive letter assigned to the mounted VHDX
        $driveLetter = (Get-DiskImage -ImagePath $vhdxPath | Get-Disk | Get-Partition | Get-Volume).DriveLetter
        $driveLetter = [string]$driveLetter

        if ([string]::IsNullOrEmpty($driveLetter)) {
            throw "Cannot access the disk. Maybe it's not a Windows VM?"
        }

        # Trim Drive Letter
        $driveLetter = $driveLetter.Trim()

        # Check BitLocker Status
        $bitLockerStatus = Get-BitLockerVolume -MountPoint "$($driveLetter):" -EA SilentlyContinue
        if ($bitLockerStatus.KeyProtector -ne $Null) {
            if ([string]::IsNullOrEmpty($Password)) {
                throw "Please provide BitLocker password."
            }
            # Unlock BitLocker
            Unlock-BitLocker -MountPoint "$($driveLetter):" -Password $Password
        }

        # Construct the target directory path
        $targetDir = "$($driveLetter):\Windows\System32\drivers\CrowdStrike"

        # Check if the target directory exists
        if (-Not (Test-Path -Path $targetDir)) {
            throw "CrowdStrike directory does not exist. Maybe you are not affected by the bug?"
        }

        # Find and delete files matching the pattern
        Get-ChildItem -Path $targetDir -Filter "C-00000291*.sys" | Remove-Item -Force

        Write-Host "CrowdStrike bug fix applied successfully."
        Write-Host "Try VirtualMetric for Azure Stack HCI monitoring: https://www.virtualmetric.com"
    } catch {
        Write-Host $_
    } finally {
        # Dismount the VHDX
        Dismount-VHD -Path $vhdxPath
    }
}

# Example usage:
Fix-CrowdStrikeBug -VMName "VirtualMetric"
BitLocker Güncellemesi
BitLocker kullanımı için script’e parola ekledik. Bu güncellenmiş örnekle, diskin BitLocker ile şifrelenmiş olup olmadığını kontrol eder ve parola sağlandığında otomatik olarak kullanır.
# BitLocker desteği için güncelleme
$SecureString = ConvertTo-SecureString "Password" -AsPlainText -Force
Fix-CrowdStrikeBug -VMName "VirtualMetric" -Password $SecureString
Bu çözüm, sanal makinelerdeki CrowdStrike hatasını hızlı ve etkili bir şekilde düzeltmenize yardımcı olacaktır.
Kaynak: https://www.linkedin.com/pulse/crowdstrike-bug-fix-azure-stack-hci-yusuf-%C3%B6zt%C3%BCrk-elw0e